Understanding the Role of Selector in Kubernetes Service
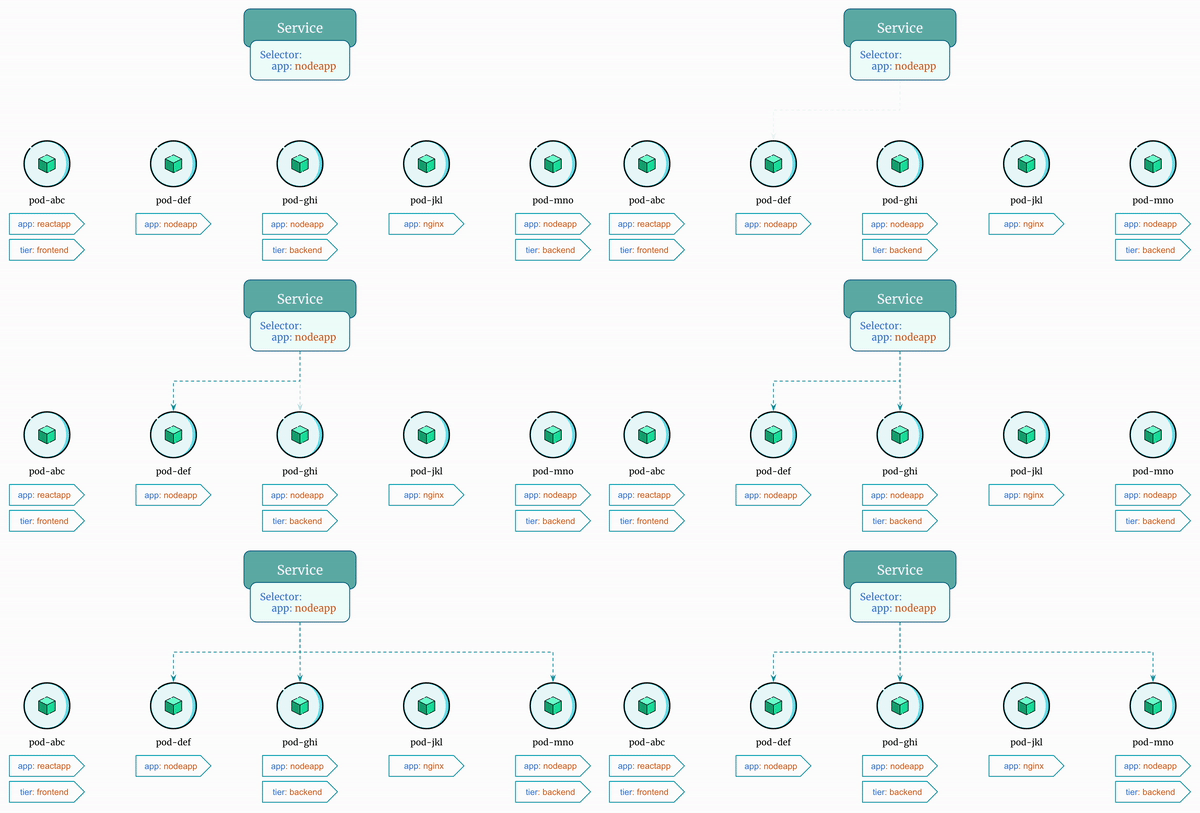
The selector is used by the kubernetes service to identify the target pods to forward the incoming network traffic to. By matching the selector labels defined in the service with the corresponding labels defined in the pod, the service can route the traffic to the correct set of pods.
Important points to keep in mind:
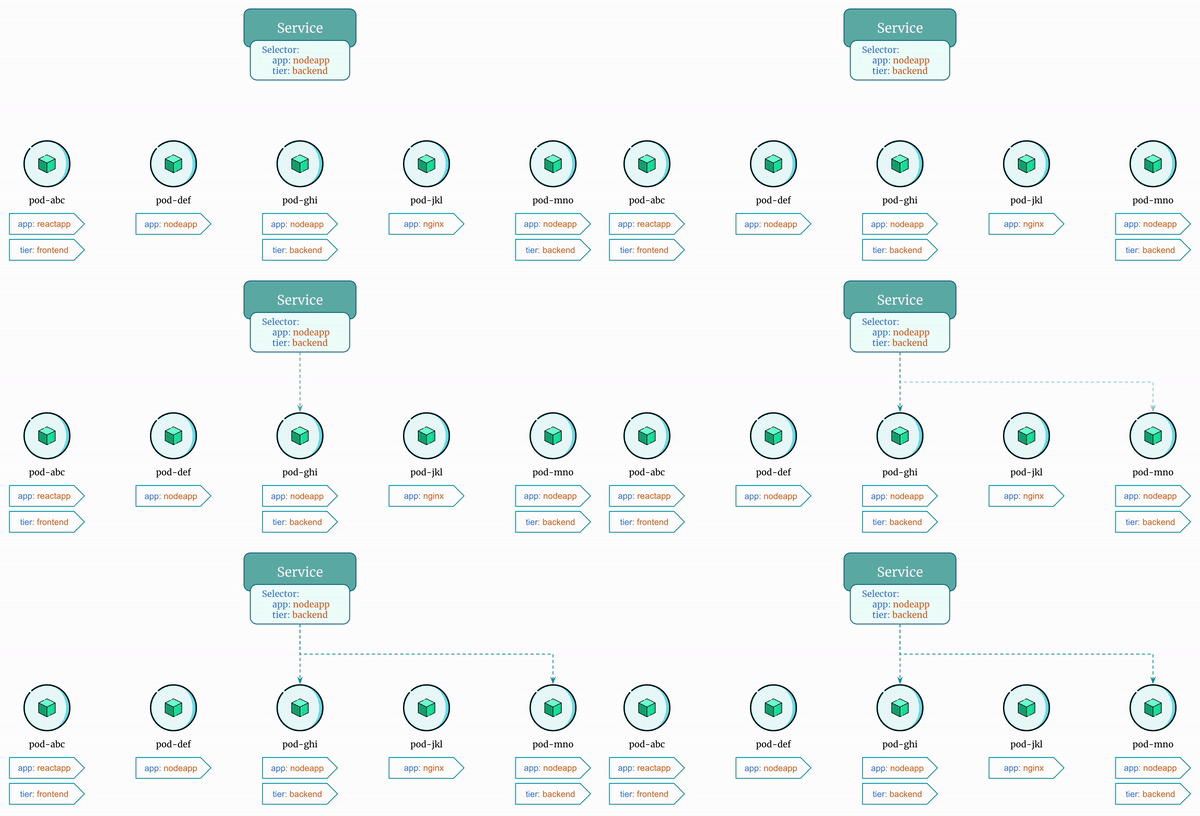
- The service sends traffic to the pods that has all the labels defined in
spec.selectorfield of the service definition. - The service has nothing to do with the
Deployments. Services send traffic directly to the pods matching the labels defined inspec.selectorfield of the service definition.
Example 1: Selector With Single Label
In the above example you will notice that the service sends traffic only to pods that has the label "app=nodeapp".
Example 2: Selector With Multiple Labels
In the above example you will notice that the service sends traffic only to pods that has both the labels "app=nodeapp" and "tier=backend".
Docker Image
Let's see the examples we discussed in action!
Here is the Docker Image used in this tutorial: reyanshkharga/nodeapp
Step 1: Create a Service
Let's create a service that selects pods with label "app=nodeapp" as follows:
Create service:
Verify the service:
Step 2: Create Pods
Let's create two pods as follows:
# Create first-pod
kubectl apply -f first-pod.yml

# Create second-pod
kubectl apply -f second-pod.yml
Note the following:
- The first-pod has a label "
app=nodeapp" - The second-pod has labels "
app=nodeapp" and "tier=backend"
List pods showing labels:
Step 3: Access the Service
Let's create a simple pod and try to access the service.
-
Create a pod:
-
Start a shell session inside the nginx container in the pod:
-
Access the service endpoint:
You'll notice that the traffic is being served from both first-pod and second-pod because both have the label "app=nodeapp" the the service use to select pods.
Step 4: Update the Service
Let's update the service by adding one more label "tier=backend" in the selector.
The updated service should look like the following:
Apply the manifest again to update the service:
Step 5: Access the Service Again
-
Start a shell session inside the nginx container in the pod:
-
Access the service endpoint:
This time you'll notice that the traffic is being served only from the second-pod because only second-pod has both "app=nodeapp" and "tier=backend" labels that the service use to select pods.
Clean Up
Assuming your folder structure looks like the one below:
Let's delete all the resources we created:

